Working with a team mailbox
Connecting a Team Mailbox (If you have full access)
If you have full access to a mailbox, you can add it as an 'additional account' using your existing credentials.
To do this, proceed as follows:
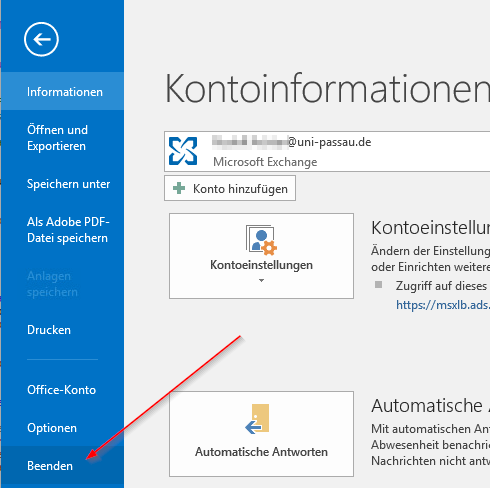
- File -> Information -> Add account
- Enter the e-mail address of the account to be connected in the following window
- After integrating the account you have to close Outlook and restart it
With the integration as an additional account, you can use the greatest possible range of functions of the mailbox.
Connecting a Team Mailbox (If you have full access)
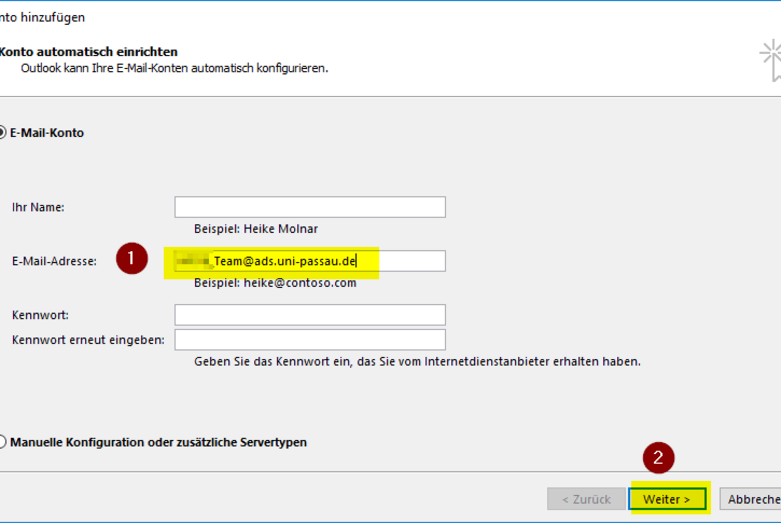
If you have full access to a mailbox, you can add it as an 'additional account' using your existing credentials.
To do this, proceed as follows:
- File -> Information -> Add account
- Enter the e-mail address of the account to be connected in the following window
- After integrating the account you have to close Outlook and restart it
With the integration as an additional account, you can use the greatest possible range of functions of the mailbox.
Connecting a Team Mailbox (If you have full access)
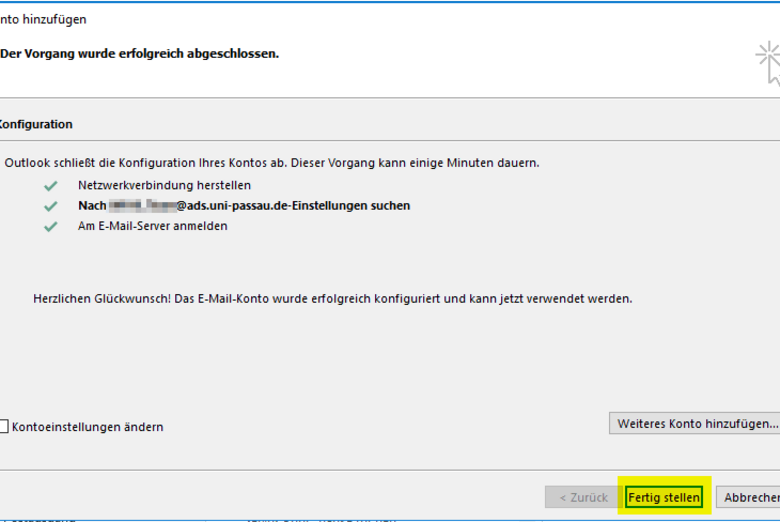
If you have full access to a mailbox, you can add it as an 'additional account' using your existing credentials.
To do this, proceed as follows:
- File -> Information -> Add account
- Enter the e-mail address of the account to be connected in the following window
- After integrating the account you have to close Outlook and restart it
With the integration as an additional account, you can use the greatest possible range of functions of the mailbox.
Integrate a team mailbox in Outlook Client (If you only have access to certain subfolders)
If you do not have full access, you cannot include a mailbox as an additional account.
Proceed as follows instead:
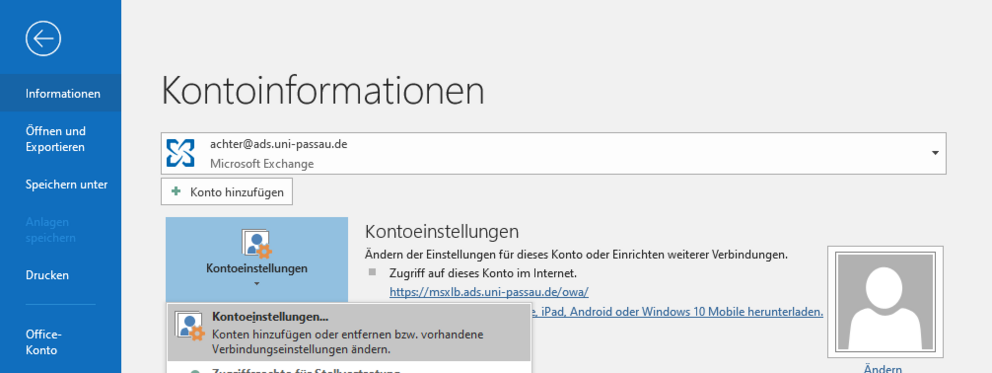
- In Outlook click top left on 'File'
- The area 'File' opens by default in the category 'Information'
- In this area, click on account settings -> account settings (yes, the submenu rubric has the same name)
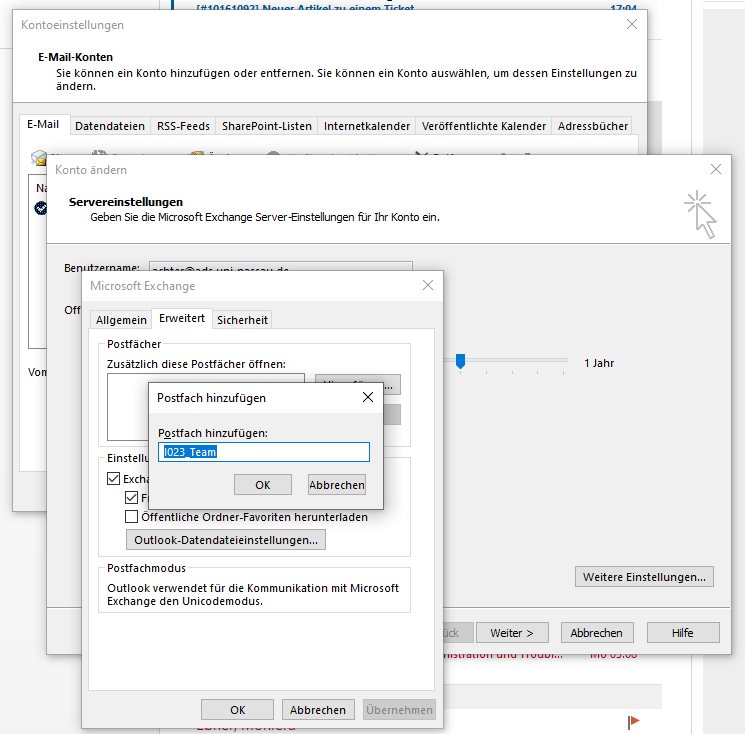
- The window 'Account settings' then opens in the tab list 'E-mail'
- Your e-mail account is selected there; click on the button 'Change'
- In the following window 'Change account', click on 'Further settings'
- A window called 'Microsoft Exchange' opens in which you can change your settings as required
- Change to the tab 'Advanced'
- Click in the area 'Extra' these mailboxes open on 'Add'
- Enter the name of your team mailbox (e.g. I023_Team)
- Confirm all open windows by clicking on OK or More
Working with a team mailbox in Outlook Web Client (OWA)
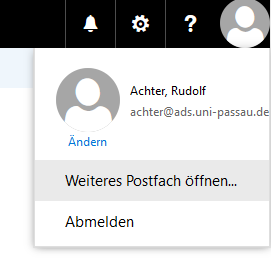
In Outlook Web Access in your browser, you can also open a team mailbox. Differently to the 'big' Outlook Client, however, you cannot show several mailboxes simultaneously. You open here only one mailbox in order to work with this. To do this, proceed as follows:
- Click on your profile photo (or its placeholder, if you don’t have any picture)
- Click on the menu item 'Open another mailbox...'
- In the following dialogue box, enter a search term for the mailbox you are looking for.
- The dialogue box begins to look automatically; if you are not satisfied with the search results, you can start another search by clicking on 'Search Directory'
- Click on the search result you want
- By clicking on Open, you open the mailbox you want
Sending an e-mail from another e-mail address
If you have a functional e-mail address, you may also want to send mails from that address. Note that you may need to authorise them to send mail from a specific address. In most cases, you get the right to 'Send on behalf of' someone else. In the operation of Outlook, this means that they often can not use the already suggested 'Send As' entry, but must select the sender e-mail address from the address book. Proceed as follows:
In the Outlook Client
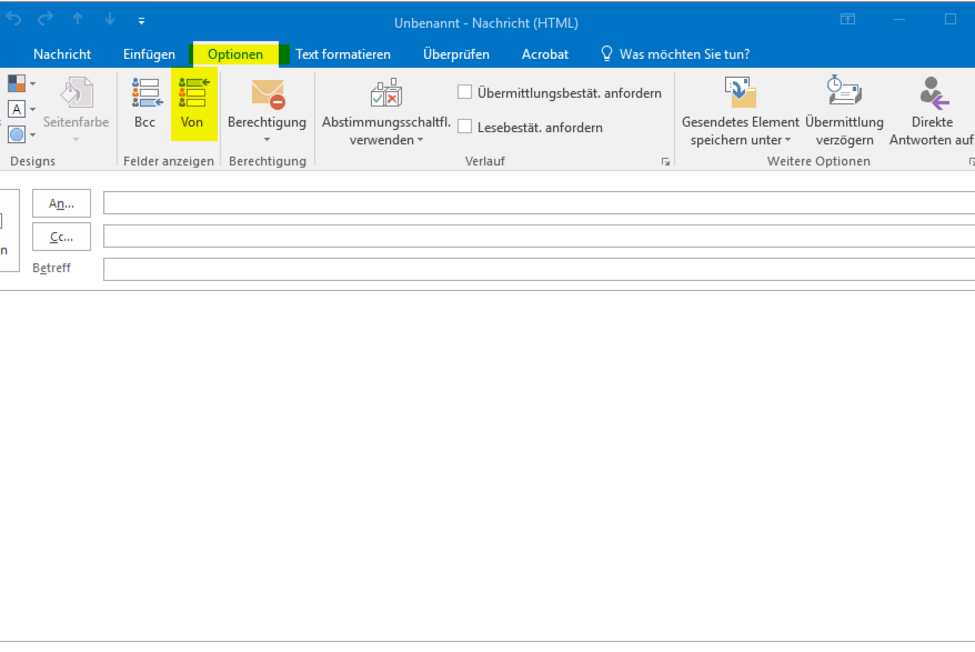
- Write a new e-mail
- Options tab -> Show From button:
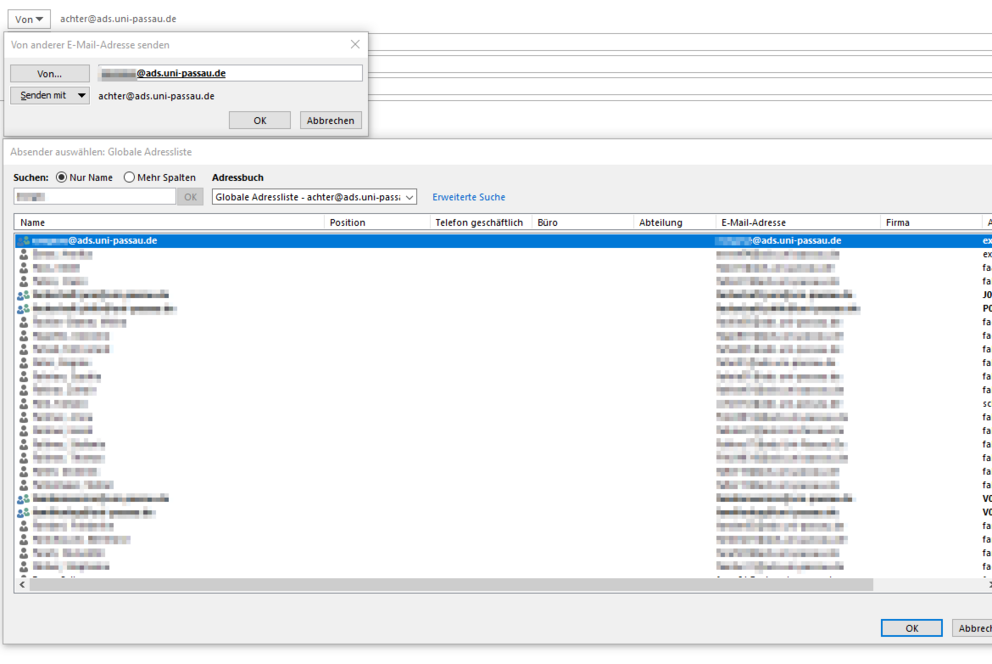
- With the additional button you can select an 'Additional E-mail Address....' from the address book
In Outlook Web Access
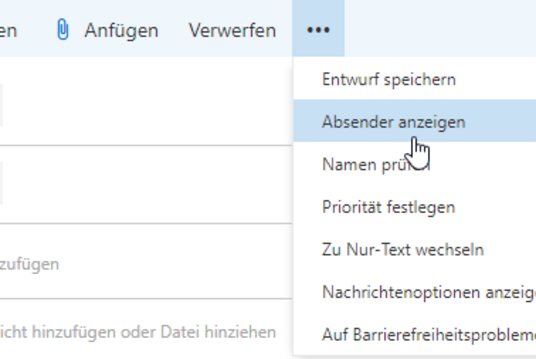
- New e-mail
- Button '...'
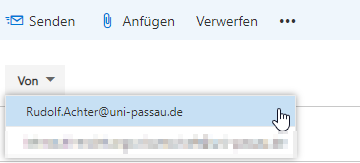
- Sender View
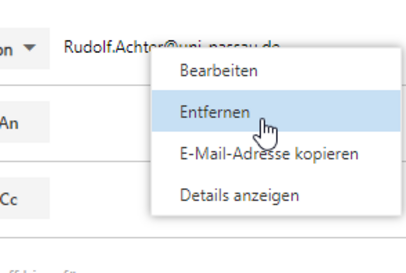
- You may have to remove the first suggested sender in the 'From' field before you can select another sender
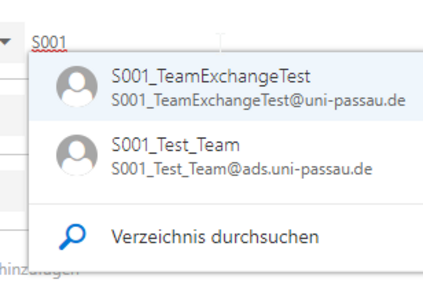
- If the 'From' field is empty, you can search for the desired sender by starting to type
Sending an e-mail from another e-mail address
If you have a functional e-mail address, you may also want to send mails from that address. Note that you may need to authorise them to send mail from a specific address. In most cases, you get the right to 'Send on behalf of' someone else. In the operation of Outlook, this means that they often can not use the already suggested 'Send As' entry, but must select the sender e-mail address from the address book. Proceed as follows:
In the Outlook Client
- Write a new e-mail
- Options tab -> Show From button:
- With the additional button you can select an 'Additional E-mail Address....' from the address book
In Outlook Web Access
- New e-mail
- Button '...'
- Sender View
- You may have to remove the first suggested sender in the 'From' field before you can select another sender
- If the 'From' field is empty, you can search for the desired sender by starting to type
Sending an e-mail from another e-mail address
If you have a functional e-mail address, you may also want to send mails from that address. Note that you may need to authorise them to send mail from a specific address. In most cases, you get the right to 'Send on behalf of' someone else. In the operation of Outlook, this means that they often can not use the already suggested 'Send As' entry, but must select the sender e-mail address from the address book. Proceed as follows:
In the Outlook Client
- Write a new e-mail
- Options tab -> Show From button:
- With the additional button you can select an 'Additional E-mail Address....' from the address book
In Outlook Web Access
- New e-mail
- Button '...'
- Sender View
- You may have to remove the first suggested sender in the 'From' field before you can select another sender
- If the 'From' field is empty, you can search for the desired sender by starting to type