Institutes
In Stud.IP, university organisational units are called Institutes. This includes faculties and academic departments, of course, but also central units, administrative departments, and teams.
Institute pages in Stud.IP
Each Institute has a page in Stud.IP, which includes the following information:
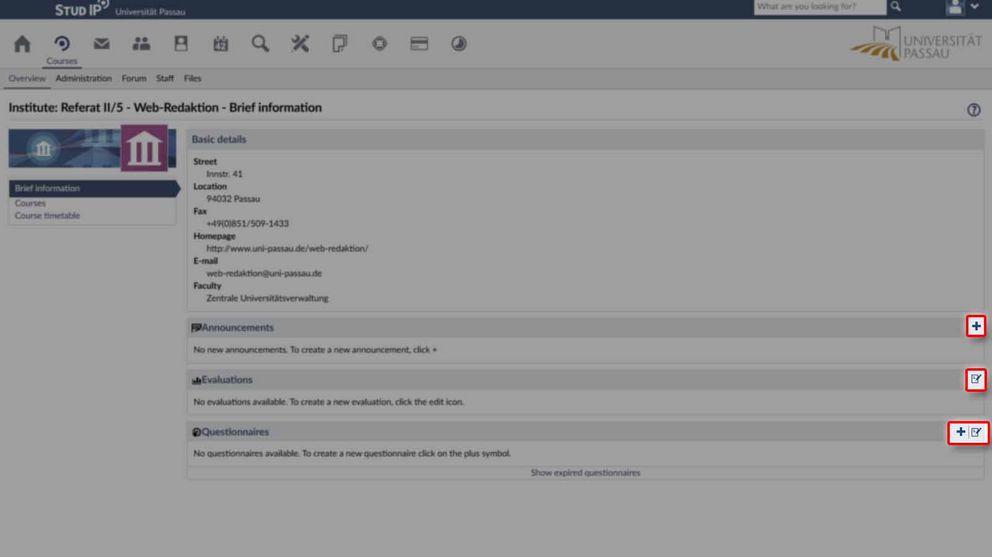
The Overview page of the Institute shows the contact details of the unit.
In your own institute, you can add Announcements, Evaluations and Questionnaires by clicking on the plus or edit symbols in the relevant area (see screenshot above).
Courses belonging to an Institute
On the Overview page, click on Courses to access the courses belonging to an Institute.
By default, all courses offered by the Institute are sorted by semester. There is a dropdown in the sidebar (on large screens) or under the "more options" menu (on narrow screens) which lets you select the semester of your choice.
Click on the course title to access the course. Click on the name of a dozent / lecturer to visit their Stud.IP profile.
You can export the course list or download (it) as Excel spreadsheet.
Course timetable
You can view all the courses belonging to the Institute displayed in a timetable by clicking on Course timetable.

The Staff section lists all people working for the Institute. By default, people are grouped by their functions, but you can switch to an alphabetic list if you prefer. There is also an Extended View, which lists additional information such as office locations and telephone numbers for staff.
Automated institute allocation
People employed by the University are automatically allocated to Institutes in Stud.IP. The allocation commences and ends at the dates specified in their employment contacts.
The Files section shows files that have been uploaded to the Institute's area in Stud.IP. In your own Institute's area, you will have higher access levels to files and actions.
Under the Actions heading and under the More Options menu next to each itme in the list, you can choose between the following options:
- Information
- Edit file (available in your own Institute's area only)
- Update file (available in your own Institute's area only)
- Move file (available in your own Institute's area only)
- Copy file
- Delete file (available in your own Institute's area only)
To upload a file in a specific folder, click on the folder and select "Upload" from the menu that appears. You can also create a "New Folder".
You can "Copy" a file and paste it into a different folder.
You can sort the file list by Type, Name, Size, Author and Date by clicking on those titles in the header row of the table.
The "All Documents" link in the sidebar (on large screens) or under the More Options menu on mobile screens lets you see all files in one list. You can download files by selecting the relevant check box and clicking on the "Download" button.
Search for an Institute
You can use the Search functionality in Stud.IP to search for Institutes.


