IMAP and SMTP
You can also access your
e-mails with other e-mail programs besides Outlook (such as Thunderbird).
However, access via other e-mail programs is then only possible via the IMAP standard protocol for the basic e-mail functions. You can use the additional team functionalities only with the Outlook Desktop App or Outlook Web Access (OWA ).
You can reach the Outlook server both within and outside the university network via IMAP or SMTP.
Access with each is possible only with the SSL/TLS-encrypted variant.
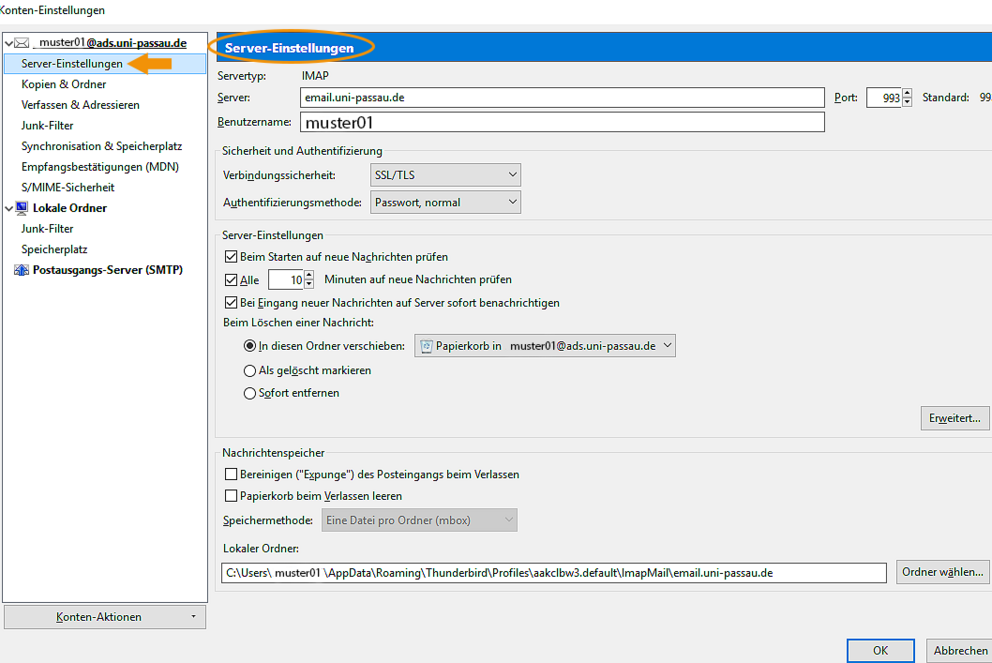
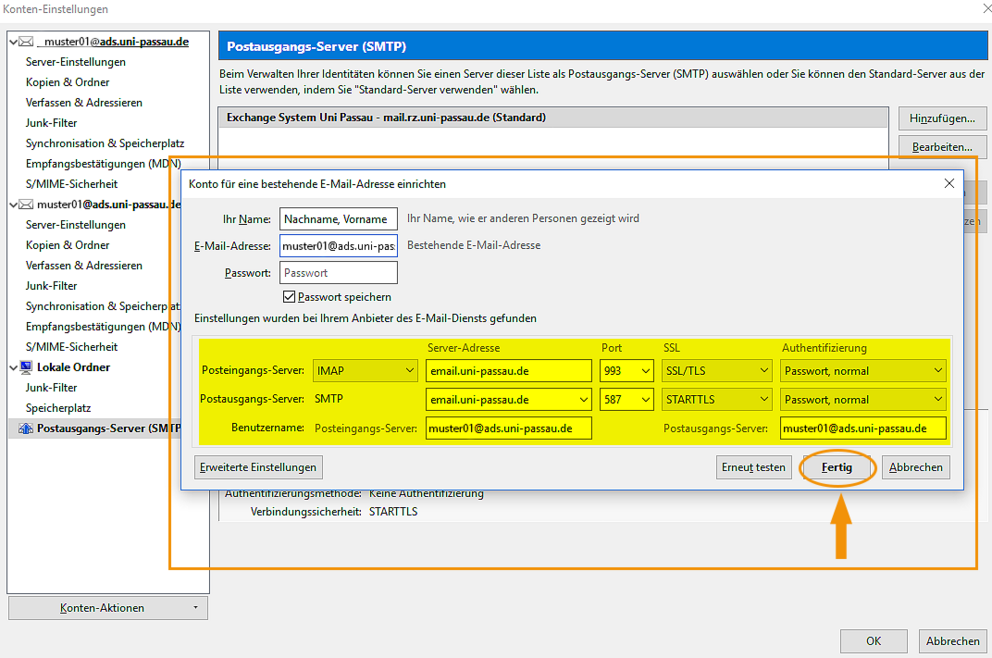
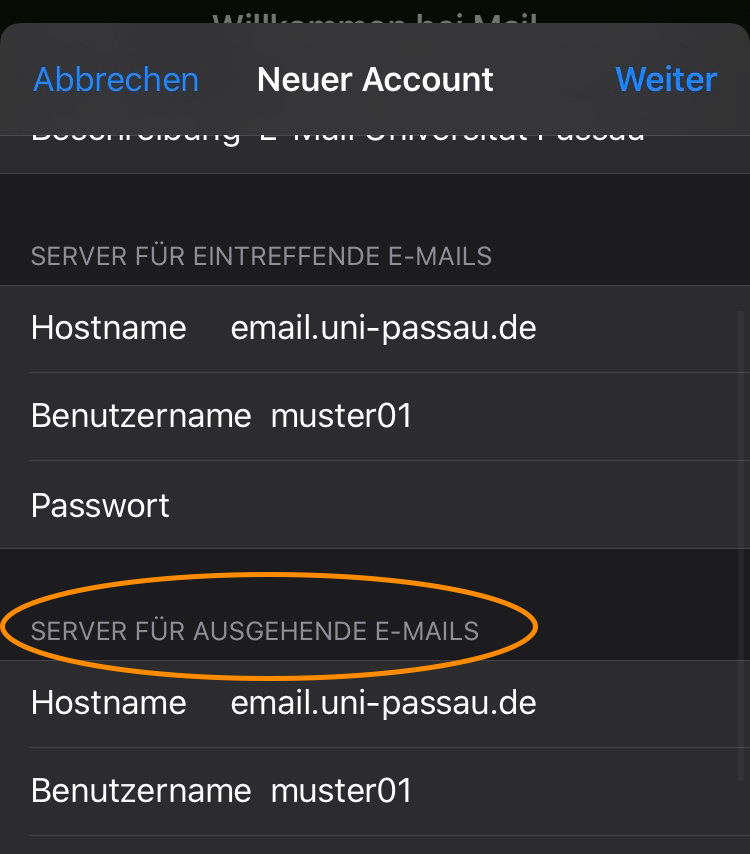
Server for incoming messages
- IMAP server: email.uni-passau.de, port 993
- Username: Username: ZIM ID (in abbreviated form, such as example01)
- Password: associated password
- Encryption: SSL/TLS
Servers for outgoing messages
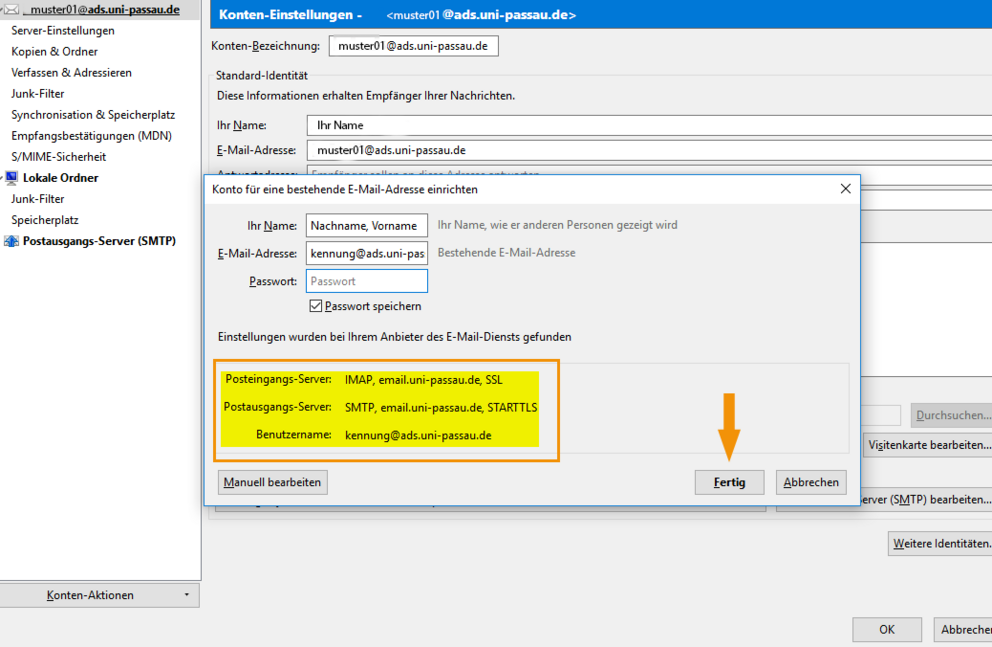
- SMTP server: email.uni-passau.de, port 587
- Username: Username: ZIM ID (in abbreviated form, such as example01)
- Password: associated password
- TLS encryption is supported: in the configuration of the outgoing mail server, such as in Thunderbird, enter STARTTLS for 'Connection Security'.
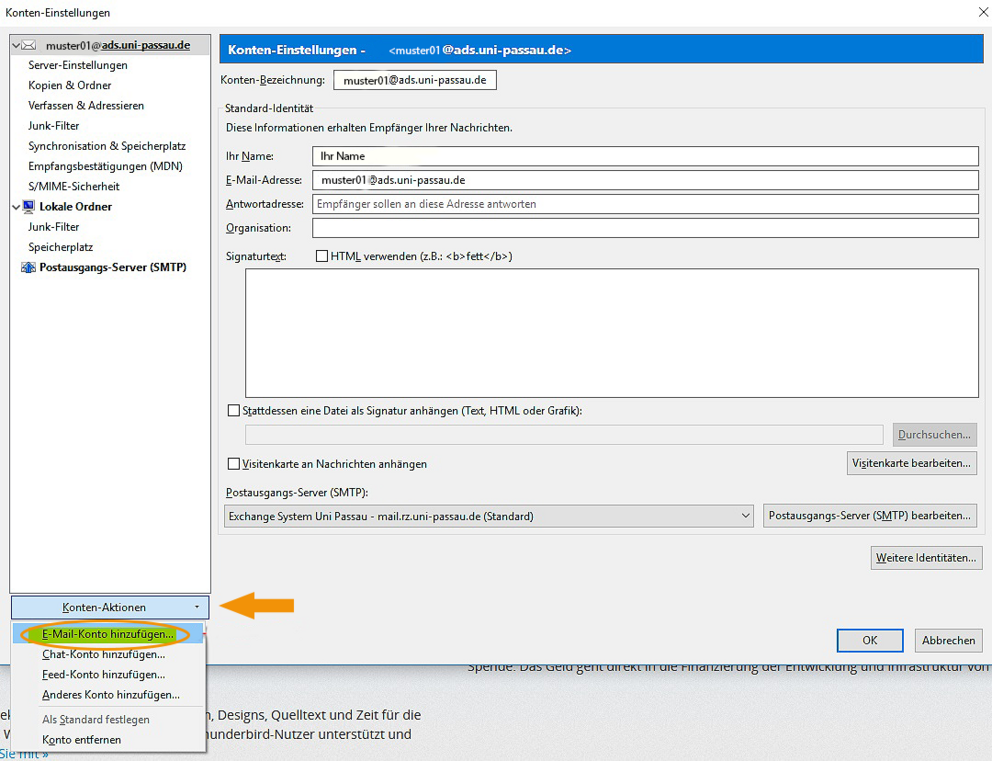
What follows is a step-by-step presentation of the configuration using Thunderbird.
In Thunderbird IMAP there are so-called subscriptions. By default, only a few folders are selected there. The Trash, Sent etc. folders are set by Thunderbird and are not synchronised.
It is, therefore, necessary to subscribe to all required (to synchronising) folders. The easiest way to do this is by right-clicking on the account > Subscriptions.
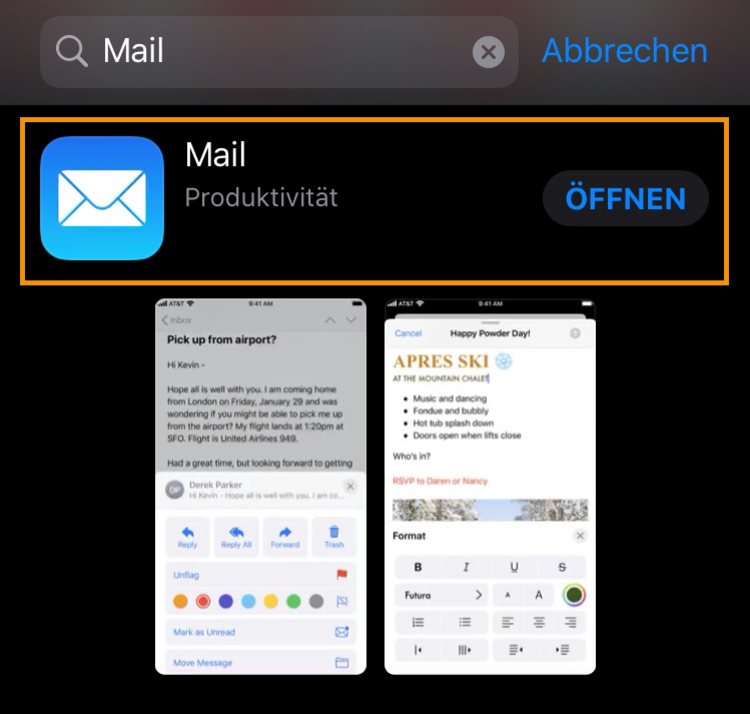
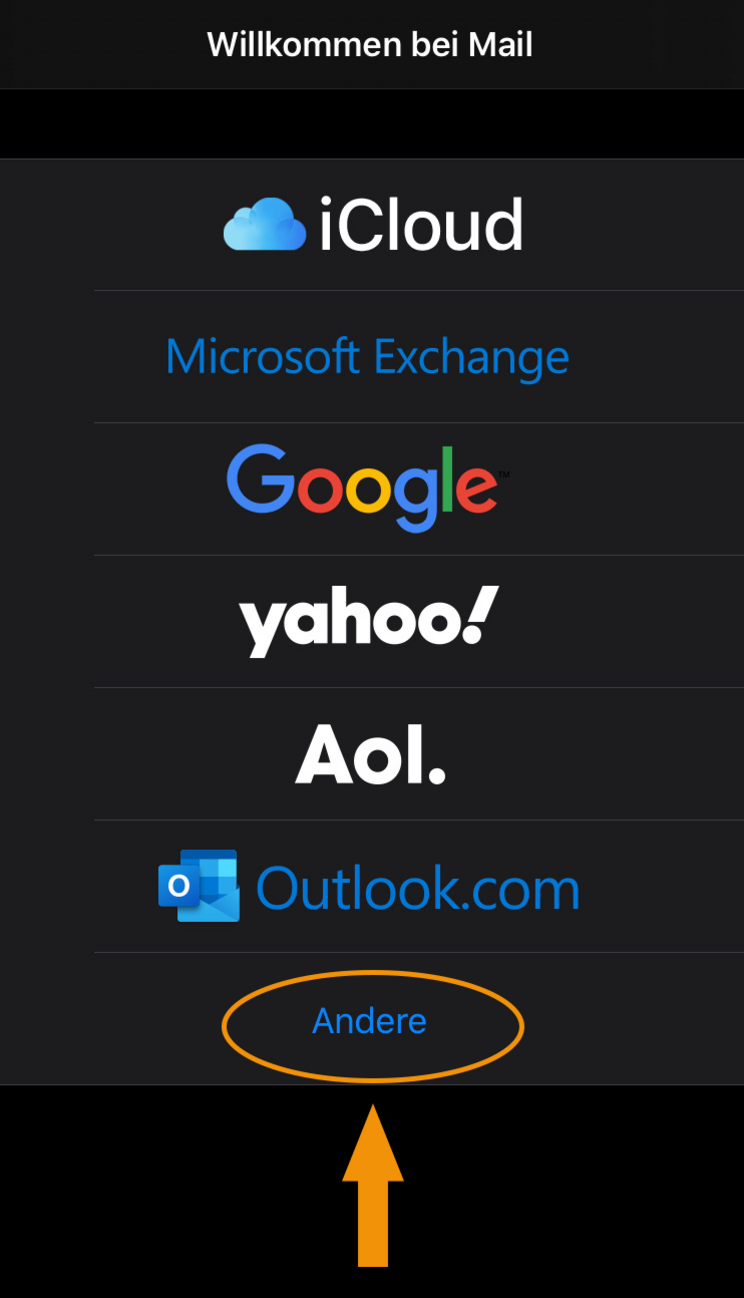
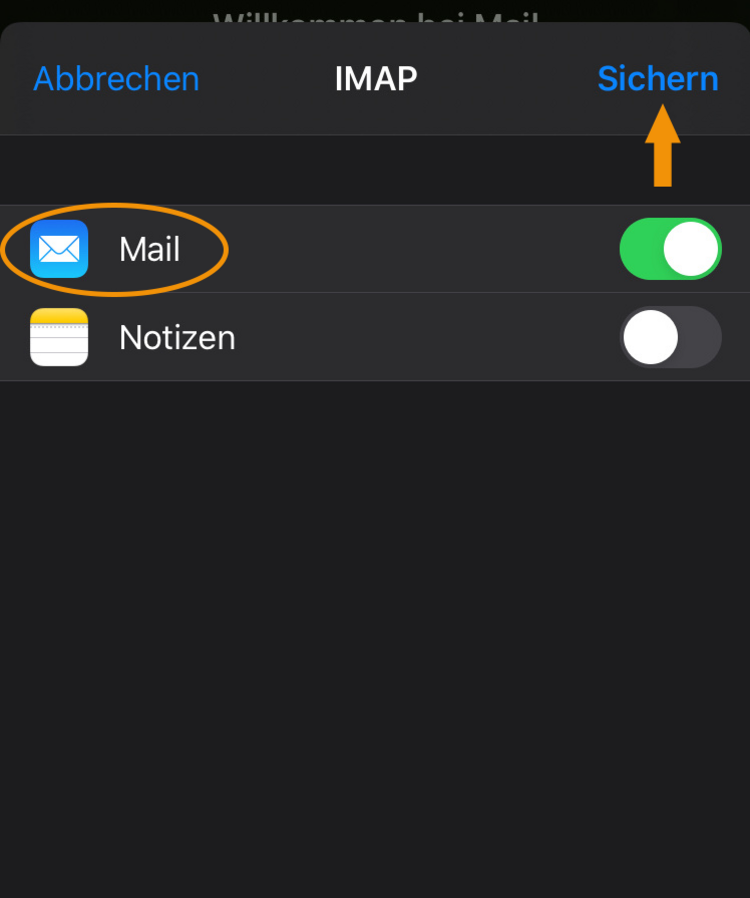
In the following, the configuration is shown step by step using IMAP (iOS).
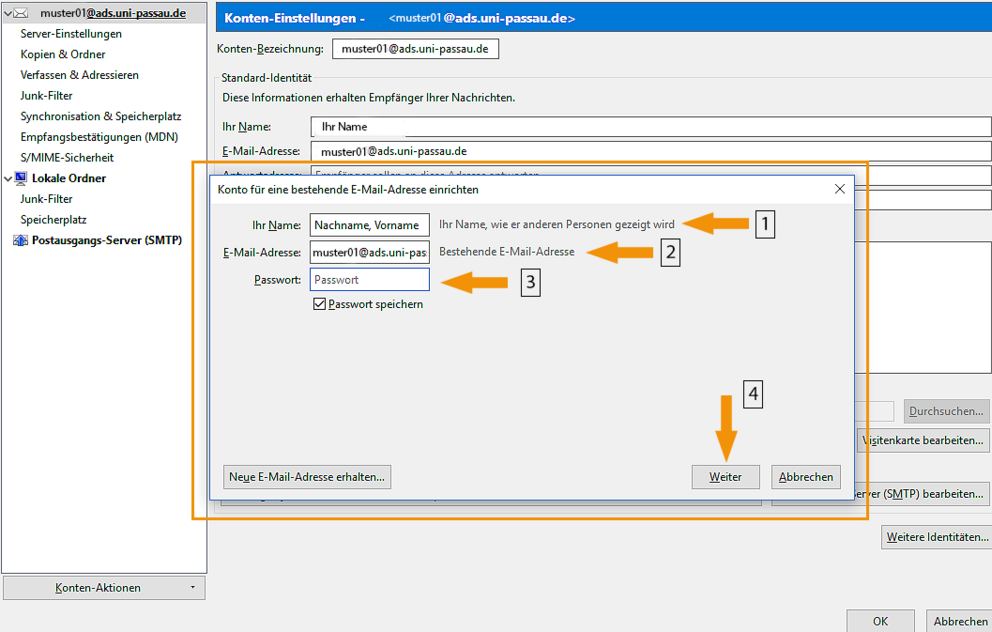
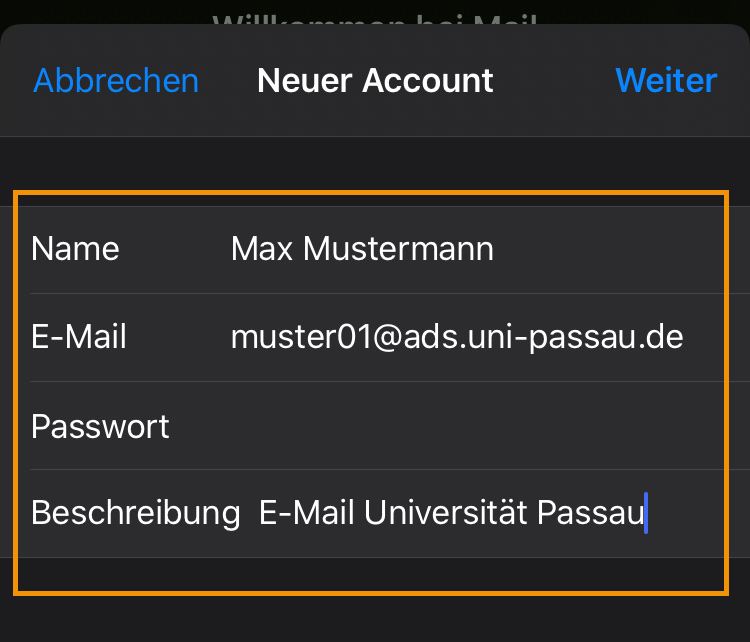
Step 3:
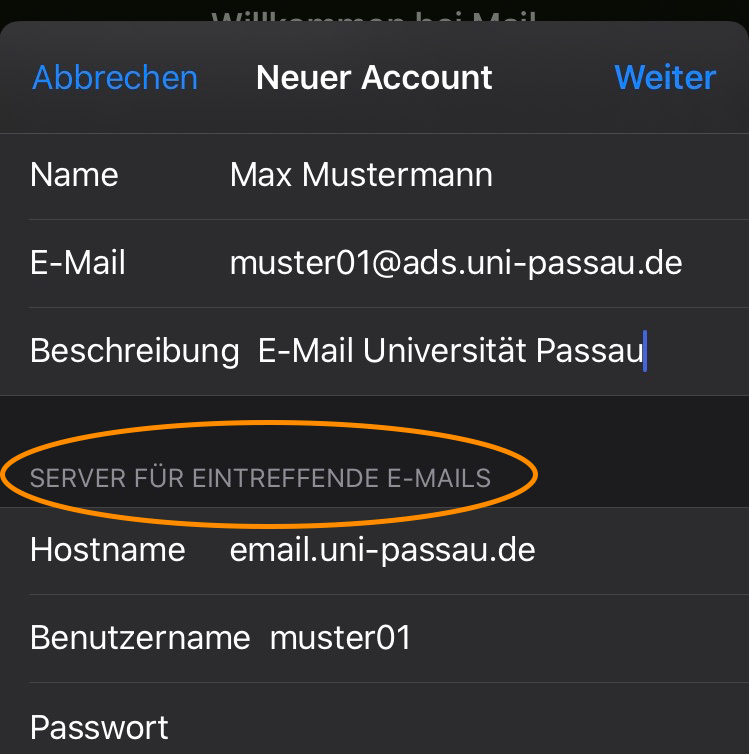
You can now create a new account. Enter the necessary information such as name and e-mail address (ZIM_username@ads.uni-passau.de), as well as the corresponding password.
Click on 'Next'.
Support
If you have further questions or are unclear about Outlook, you can find more information here:
If you encounter further problems, please contact ZIM Support.
Further details, tips & tricks, tutorials, videos and much more can also be found in the official Outlook Help Center from Microsoft.


