Access via mobile devices
The screenshots come from an Android tablet. Therefore, the appearance and arrangement of the elements can be somewhat different from your device. All functions are available except editing the profile and subscribing.
The Windows phone app still has limited functionality and has read-only access to the data. The design differs from the other platforms and therefore doesn’t correspond to the pictures in these instructions.
Overview
Apple iOS, Android, Blackberry and Windows Phone 8 are supported. You can download the apps from their respective app stores.
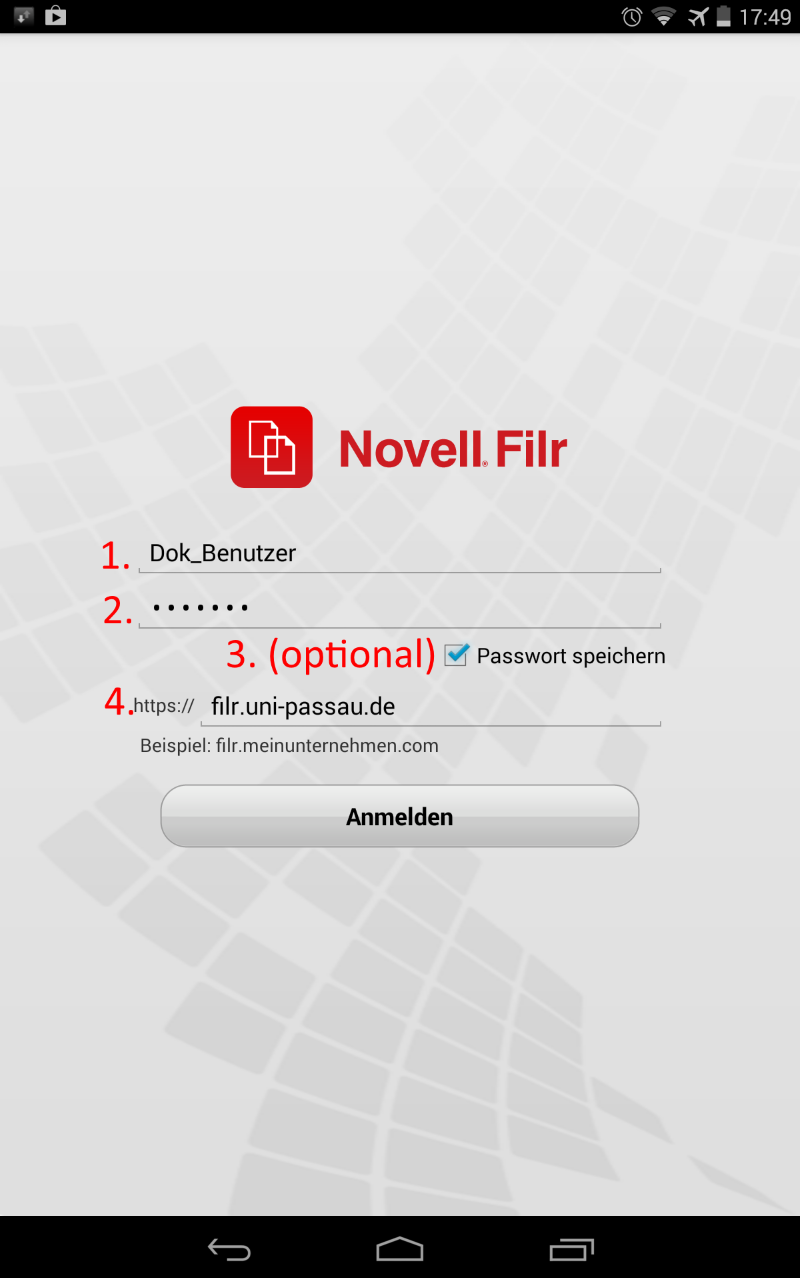
To log in with an app, enter your RZ-NDS ID (1.) with the associated password (2.). You can store the password if you wish (3.). But for security reasons, this is not recommended. As an address you should enter 'filr.uni-passau.de. Now you can log in by tapping the button 'Log In'.

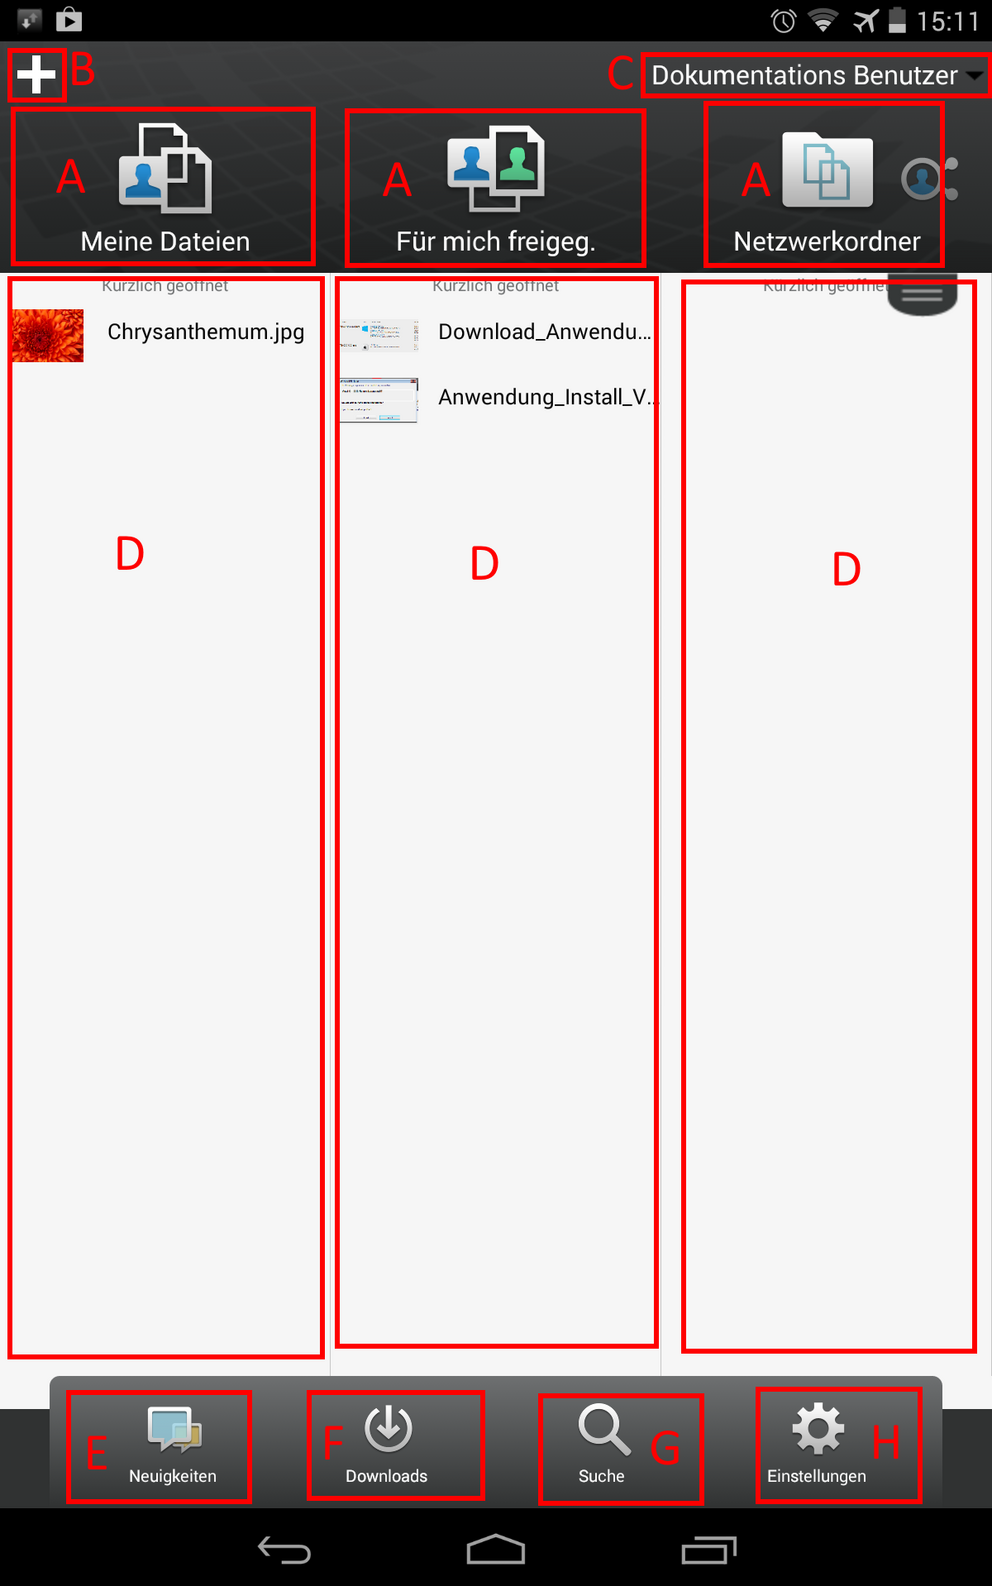
On the home screen, from the browser you’ll see familiar areas and the files that were recently opened with the app. Swipe left or right to move the columns.
The view consist of the following parts:
- To navigate to a certain area, tap the corresponding symbol (A).
- To upload a file, tap the 'Plus' in the upper left (B).
- To log off, tap on your name (C) in the upper right and select 'Log Off'.
- In the columns (D), the files most recently opened within the app are shown.
- You can call up the most recently altered files and indexes with the button 'Recent' (E).
- Under 'Downloads' (F), you’ll find the files synchronised on your device.
- With the magnifying glass (G), you can search for files and content.
- Under 'Settings' (H), you can call up Novell’s 'Help' for the app and change the settings.

Working with files and folders
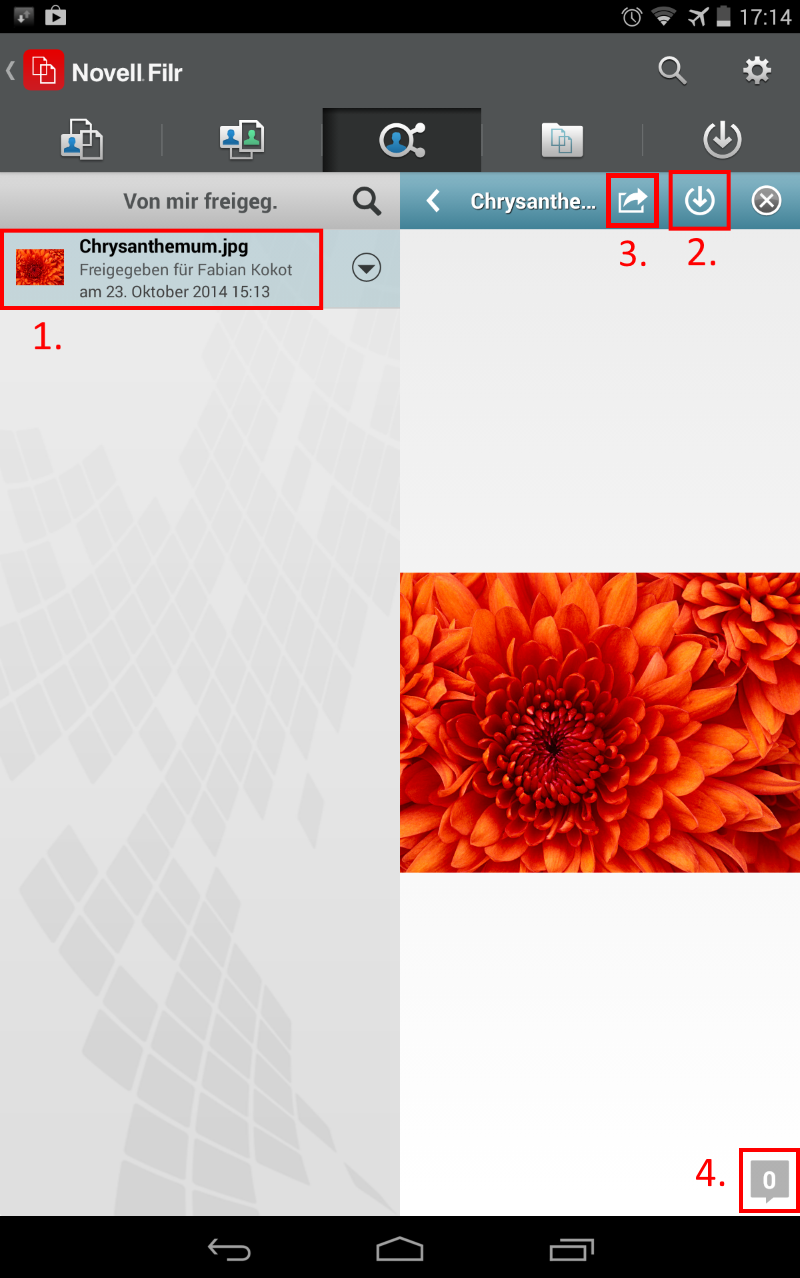
To do this, select the file from (1.). Now you can choose whether you wish to download the file (2.) or open it in another app (3.).
Downloaded files will be synchronised with Filr every 15 minutes so you always have the current version.
Note: You can download files only on your device.

In the start screen, tap the 'Plus' (B). Then select the file to be uploaded and the target folder.

To release a file or folder, perform the following steps:
- Tap the small triangle next to the name of the entry.
- Select the option 'Release'.
- In the search field, enter the name of the user, the group or the e-mail address and select the appropriate entry.
- Set the desired authorisation.
- Set the expiry date.
- If necessary, enter a brief text.
- Click 'Save'.
To change or delete a release, perform the first two steps and then select the entry to be changed. Now you can change the options or delete the release.
Additional assistance
You can obtain additional information in the Brief Instructions from Novell.


